Iron and Steel
Difficulty: hard. The hardest thing in this repo, and the most valuable. Prerequisites: fire and heat (a lot of charcoal, good bellows), pottery (refractory clay), a stone anvil and hammers.
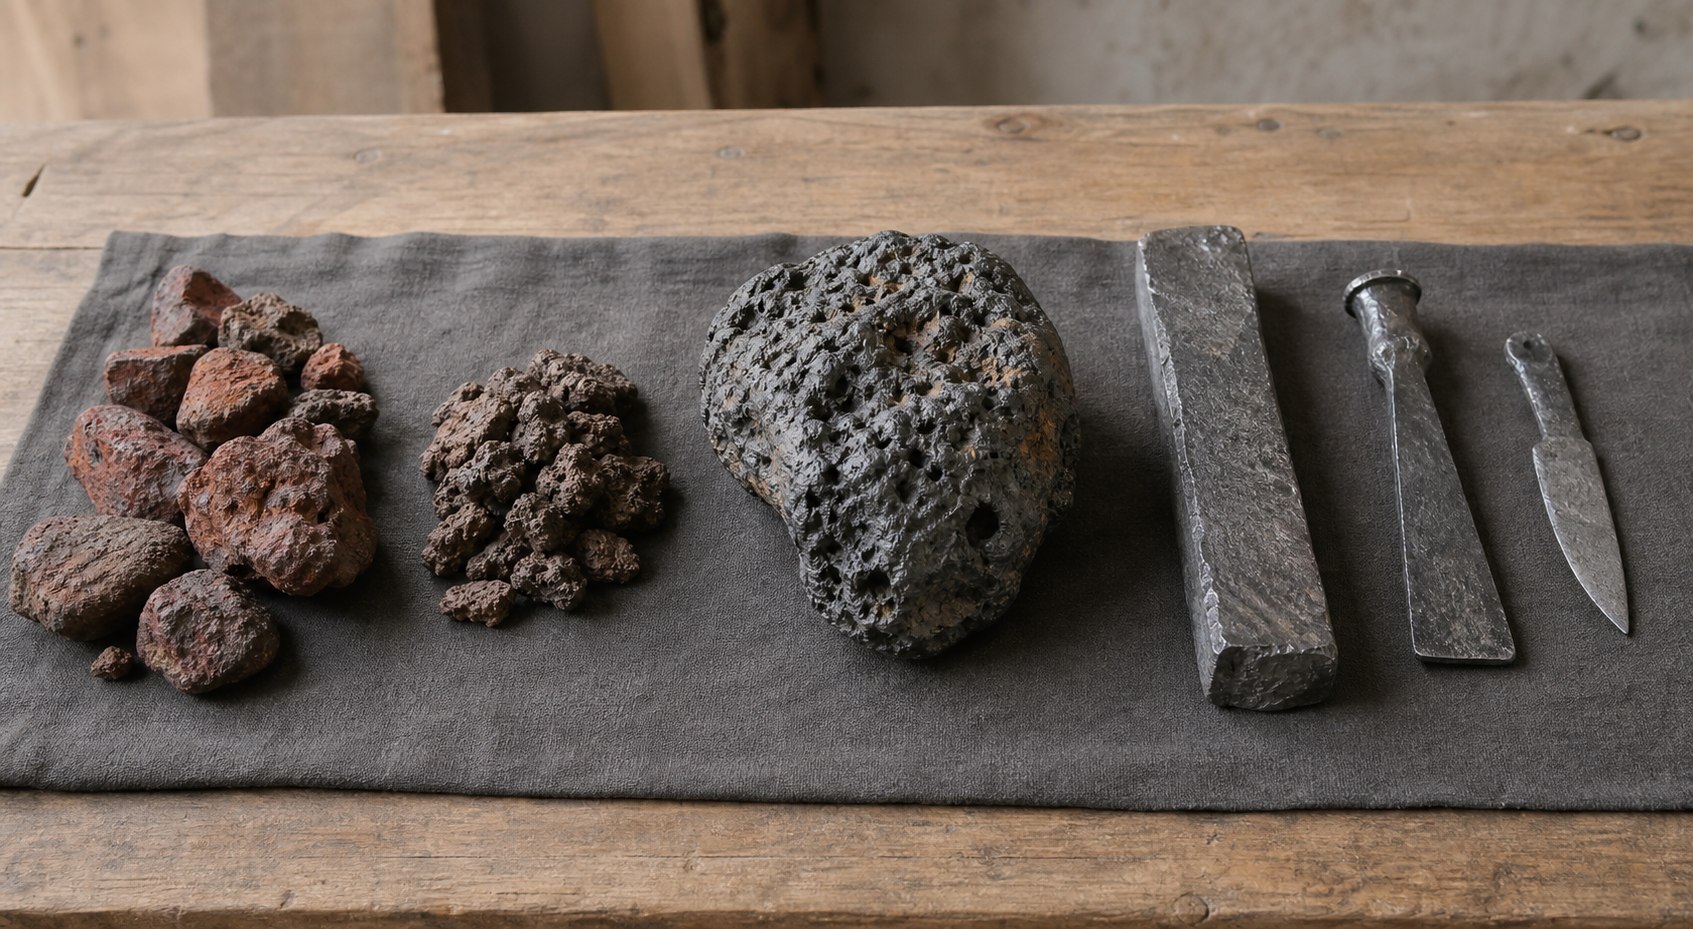
AI-generated visual reference: ore → bloom → consolidated bar → forged tools. It is not a historical photograph, material-identification standard, or process endpoint.
Why it matters
Iron is tools that cut other tools. It's plows that turn heavy soil, saws, axes, nails, springs, wire, gears, and every machine you might want to build. Copper and bronze are easier, but iron ore is everywhere and copper ore is not — which is why iron eventually beat bronze despite being harder to make.
The central variables: composition, structure, and heat treatment
Carbon content is central, but it does not control iron by itself. Properties also depend on phase and microstructure, grain size, slag and other inclusions, phosphorus and sulfur, alloying elements, prior working, and heat treatment. Ancient smiths often lacked modern compositional measurement, yet many developed effective empirical carburizing, quenching, tempering, and material-sorting traditions. The modern advantage is to measure and record those interacting variables rather than treating every result as luck.
| Carbon | Name | Behavior |
|---|---|---|
| ~0% | Wrought iron | Soft, tough, bends rather than breaks, welds easily, cannot be hardened |
| under ~0.25% | Mild steel | Tough and ductile, welds well, barely hardenable. Structural work, nails, wire |
| 0.3–0.6% | Medium-carbon steel | Strong and tough, hardens usefully — springs, axles, hammers |
| 0.6–0.8% | Spring/tool steel | Holds an edge and a spring. Swords, saws, springs |
| 0.8–1.2% | High-carbon steel | Takes a keen edge, hardens hard, more brittle — knives, chisels |
| 2–4% | Cast iron | Melts at only ~1150°C so it can be poured, but brittle and unforgeable |
Note the melting points. Pure iron melts at 1538°C, which is brutally hard to reach with charcoal. But cast iron at 4% carbon melts at ~1150°C, which is easy. This is why two completely different traditions exist: the European bloomery (never melts the iron, works it as a solid sponge) and the Chinese blast furnace (melts it, pours it, then removes carbon afterward).
Finding ore
General prospecting technique — gossans, streak and density tests, panning upstream, gravity concentration, and assaying before committing labor — is in mining and prospecting. This section covers iron ores specifically.
Iron is the fourth most common element in the crust. You will find some.
| Ore | Looks like | Quality |
|---|---|---|
| Hematite (Fe₂O₃) | Grey-black to red, heavy; leaves a red-brown streak on unglazed pottery | Excellent, up to 70% iron |
| Magnetite (Fe₃O₄) | Black, heavy, magnetic — a lodestone sticks to it | Potentially excellent; magnetic black sand may instead contain titanomagnetite or ilmenite and must be concentrated and assayed |
| Limonite / goethite | Yellow-brown, earthy, often lumpy | Good, easy to smelt |
| Bog iron | Rusty-brown crusts, pellets, or spongy masses in bogs, marshes, and slow streams | Accessible and sometimes renewable, but grade, phosphorus, regeneration time, and sustainable harvest are site-specific |
| Siderite (FeCO₃) | Grey-brown, moderately heavy | Fine, roasts easily |
| Pyrite | Brassy yellow cubes | Avoid — sulfur ruins iron. See sulfur instead |
Start with a locally available ore that assays well in small trial smelts. Bog iron served many northern European communities because it was accessible, but it was not universal and wetland extraction can damage water and habitat. A rusty sheen or magnetic concentrate is a prospecting clue, not proof of smeltable ore.
Avoid sulfur and phosphorus. Sulfur makes iron crack when hot ("hot short"); phosphorus makes it crack when cold ("cold short"). Bog iron is often phosphorus-rich, which is workable but gives brittle results in cold weather.
Step 1: Roast the ore
Roasting can drive off water and carbonates, oxidize some minerals, and make an appropriate ore easier to crush. Do not open-roast unknown ore. First assay for sulfur, arsenic, lead, mercury, and other volatile or toxic constituents. When roasting is justified, use a designed furnace and captured exhaust under a process-specific exposure and emissions review. Crush by wet or enclosed, locally extracted methods; control silica and metal-bearing dust. Size the validated charge uniformly because excess fines choke the furnace and large lumps may not reduce through.
Step 2: The bloomery — the realistic route
What it does: reduces iron ore to solid metal without melting it, at 1200–1300°C, producing a spongy mass of iron and slag called a bloom.
Build the furnace: a clay shaft roughly 1.2–1.5 m tall and 25–30 cm internal diameter, walls 10–15 cm of heavily grogged clay, with one or two tuyères entering low (about 20 cm above the base) and angled slightly downward. Dry it thoroughly, then fire it gently for a day before use. Build a small tapping arch at the base for slag.
Run it:
- Preheat with a wood fire for several hours, then fill with charcoal and get the whole column burning.
- Start the bellows. Airflow is the main control — roughly 300–500 litres per minute for a furnace this size, which is two people working hard.
- Charge alternately: a measure of charcoal, then a measure of roasted ore, repeatedly, keeping the furnace full. Typical ratio is 1:1 by weight, sometimes more charcoal.
- Add flux only if ore and slag trials show it is needed. Limestone or shell can help some silica-rich charges, but ores may self-flux and the wrong calcium addition can make unsuitable slag or increase iron loss. Set the addition from characterized ore/gangue chemistry and small smelts, not a handful-per-charge rule.
- Tap the slag periodically from the base. It runs out as a glowing dark liquid. If slag builds up inside, it drowns the reaction zone and the smelt fails. This is the most common cause of failure.
- After 4–8 hours, stop charging, burn down, and break open the furnace front.
- Extract the glowing bloom with tongs. It's a lumpy, spongy mass, maybe 20–30% of the ore weight, riddled with slag and charcoal.
Chemistry: carbon monoxide from the charcoal does the reducing —
Fe₂O₃ + 3 CO → 2 Fe + 3 CO₂ — which is why a reducing (fuel-rich, air-starved
above the tuyère) atmosphere is essential. If you over-blow with too much air,
you re-oxidize the iron into slag and lose the batch.
Step 3: Consolidate the bloom
The bloom is not usable iron yet. It's iron sponge full of slag.
While still at welding heat (bright yellow-white, ~1200°C), hammer it hard and repeatedly. Slag squirts out as glowing sparks and liquid. Fold and weld the mass on itself, reheat, hammer again. Repeat many times. Each cycle drives out more slag and welds the iron sponge into solid metal.
The result is wrought iron: tough, ductile, with characteristic stringers of residual slag that give it a wood-like grain. Historically this was the material of everything from nails to anchor chains, and it rusts far more slowly than modern steel.
Expect to lose half the bloom's weight to slag and scale. This is normal.
Step 4: Make steel
Four historical routes, easiest first.
A. Carburize the surface (case hardening) — easy, do this first
Pack a finished wrought-iron tool in a sealed clay box with charcoal, bone meal, leather scraps, or hooves, and hold it at a bright red heat (900–950°C) for hours. Carbon migrates into the surface — roughly 1 mm per several hours. You get a hard steel skin on a tough iron core, which for many tools is exactly what you want.
B. Blister/cementation steel — the industrial version of A
Same process, but on thin bars, held for days (a week was typical), so carbon penetrates all the way through. The bars come out blistered on the surface. This was Europe's main steel source from the 17th century.
To even out blister steel, forge-weld bars together and draw them out; repeating that operation produces double shear and related grades. Japanese swordsmithing folds and welds selected bloomery steel for its own material and construction system. Pattern welding deliberately combines and twists bars of differing composition to make a composite pattern. These practices overlap in forge-welding skill but are not interchangeable names or one universal process.
C. Crucible steel (including wootz traditions) — specialized high-carbon steel
Seal wrought iron together with a measured amount of carbon (charcoal, or green plant matter) in a sealed clay crucible and heat it to 1400–1500°C until the charge melts. Melting can improve chemical uniformity and allow some slag to separate, but it does not reject every inclusion or guarantee a sound, homogeneous, superior ingot. Crucible quality depends on feedstock, refractory contamination, carbon and trace elements, porosity, cooling, and forging.
This is hard — it needs a high-quality furnace, crucibles, measured charge, and strong forced air. Several South and Central Asian traditions produced crucible steels in antiquity. A wootz-type watered pattern requires a suitable chemistry, controlled solidification, thermal cycling, and careful forging; “Damascus” can also refer to later blades and patterns made by different routes.
D. Decarburize cast iron — the Chinese route
If you can build a tall enough furnace with strong enough air to actually melt iron (the Chinese had blast furnaces by ~500 BCE, helped by good refractory clay and box bellows), you get liquid cast iron. Cast iron is instantly useful for pots, plowshares, and cannon — anything that can be cast rather than forged.
To work it further, oxidize the excess carbon away: stir the molten or semi-molten metal in an oxidizing atmosphere (puddling), or hold decarburizing cast iron in contact with air until the carbon burns out.
Be clear about what traditional puddling chiefly gives you: wrought iron, not bulk steel. Puddled bar still had to be converted by another route when steel was wanted. Puddling remained a batch, fuel-, and labor-intensive process limited by the furnace and puddler, but industry did scale output through larger works, many furnaces, teams, and later mechanized handling. It was not the same route to cheap bulk steel as Bessemer or open-hearth conversion.
Mass-produced steel arrives with Bessemer's converter (1856), which blows air straight through 15 tonnes of molten pig iron at once and lets the carbon's own combustion supply the heat, and with the open-hearth process that followed. Those are what industrialized the world. Both are out of reach here, and both are worth knowing about so you don't mistake puddling for a shortcut to cheap steel — for your purposes, cementation and crucible steel remain the routes that actually work.
Step 5: Heat treatment — where knowledge really pays
Heat-treatment response depends on composition and prior microstructure. Many plain-carbon steels can be hardened and tempered; wrought iron generally does not through-harden, while case-hardened surfaces and alloy steels need their own specifications.
Do not identify an unknown metal by quenching a valuable part. Use composition, microstructure, and controlled coupon/hardness testing; a file response is affected by surface scale, case depth, quench, geometry, and file condition.
Hardening: use a steel-specific austenitizing temperature and soak, then a compatible quenchant and agitation schedule. Loss of magnetism is only a rough field observation near iron's Curie transition; it is not the critical temperature or soak specification for every carbon or alloy steel. Establish the cycle on identified material and test coupons. Water and brine quench rapidly and can crack parts; oil is slower but adds serious fire and fume hazards. A hardened part must then be tempered for its actual section and service.
Tempering: use a composition-, section-, and service-specific time and temperature after hardening. Oxide colors on clean plain-carbon steel are a rough historical surface-temperature indication only; alloy, atmosphere, surface finish, time, lighting, and heating rate change the relationship:
| Color | Temp | Use |
|---|---|---|
| Pale straw | ~200°C | Razors, engraving tools |
| Dark straw | ~230°C | Knives, drills |
| Bronze/purple | ~260°C | Axes, chisels, punches |
| Blue | ~290°C | Springs, saws |
| Grey-blue | ~330°C | Springs needing max toughness |
Cool by the specified method after the required soak. An inadequately tempered hardened part can fail brittlely; color alone does not release a critical tool.
Annealing/normalizing: choose the cycle for the identified steel and desired microstructure. “Red heat and the slowest possible cooling” is not universal and can cause excessive grain growth or the wrong carbide structure.
Forge welding
Two compatible clean pieces at a material-appropriate welding heat can fuse under hammer blows. Work below incipient burning: sparks from the steel itself can mean oxidation and permanent grain damage, especially in high-carbon steel. A compatible flux may help disrupt oxide, but sand and borax are not universal for every alloy or refractory. Prove the temperature, scarf, flux, and hammering sequence on coupons before a critical weld.
Tools you need before you start
- Anvil: a large hard stone works; a block of your own iron is far better and should be an early project.
- Hammers: start with stone, upgrade to iron immediately.
- Tongs: use sound iron or steel tongs sized and shaped to retain the hot work securely. Do not lift a bloom with green-wood or improvised unverified grips.
- Charcoal: vastly more than you expect. See fire and heat. Build a site mass balance that records dry wood-to-charcoal yield, ore grade, charcoal:ore charge, bloom yield, consolidation loss, failed heats, and transport. A single wood-per-iron number without those boundaries is misleading.
Failure modes
| Symptom | Cause | Fix |
|---|---|---|
| No bloom, just slag | Too much air (oxidizing), or too little charcoal | More charcoal, less blast; keep the stack full |
| Furnace clogs, nothing tapping | Slag chemistry, temperature, sizing, or tapping problem | Diagnose from ore/slag trials; change flux only from characterized chemistry |
| Bloom crumbles under the hammer | Worked too cold, or too much slag | Hammer at welding heat only; more consolidation cycles |
| Iron cracks when hot-worked | Sulfur or another contaminant, overheating, or unsuitable structure | Assay ore and fuel; use characterized low-sulfur fuel/coke where suitable; change material or process |
| Iron cracks when cold-bent | Phosphorus | Different ore; unavoidable with some bog iron |
| Steel won't harden | Composition, austenitizing, soak, section, quenchant, or decarburization problem | Identify the steel and validate its heat-treatment cycle on coupons; magnetism alone is not the endpoint |
| Blade cracks on quench | Too fast a quench, or uneven heating | Oil instead of water; heat evenly; temper immediately |
| Edge chips in use | Not tempered, or tempered too little | Temper to the right color |
| Edge bends instead of holding | Too soft — over-tempered or too little carbon | Less tempering; more carburizing |
| Forge weld won't take | Oxide, bad scarf/fit, incompatible material/flux, or wrong heat | Clean and fit the joint; validate material-specific heat and flux; stop before the steel burns |
Safety
- Forge scale flies off hot iron at speed. Eye protection matters more here than anywhere else in this repo.
- Quenching throws steam and hot oil; oil quench tanks catch fire — keep a lid.
- Bloomery, forge, and charcoal fires can create lethal carbon monoxide. Use designed local exhaust and make-up air, calibrated CO alarms/monitoring, and restricted access; never enter a furnace, pit, or poorly ventilated room without a confined-space assessment and independent rescue capability.
- Never heat galvanized, painted, or unknown scrap metal — zinc fume causes metal fume fever and worse.
- Refractory, ore, flux, and scale can contain silica and toxic metals. Use wet/enclosed handling, local extraction, exposure monitoring, hygiene, and task-specific eye, face, hearing, heat, and respiratory protection.
Era notes
Ironworking emerged and spread through multiple regional traditions; Anatolia is important but not a universal single source. South Asia developed early crucible-steel traditions, and Chinese foundries produced cast iron by the first millennium BCE. Adoption depended on ore and fuel, refractory and furnace skill, labor and political organization, existing bronze industries, trade and tin supply, and the usefulness of particular iron products—not one migration or one supply disruption.
Your genuine knowledge advantages, in order of value:
- Measure composition, inclusions, working history, and heat treatment together.
- Treat loss of magnetism as a rough observation, then validate the actual hardening cycle for the steel.
- Temper colors as a temperature scale.
- Reducing atmosphere is what makes iron; oxidizing atmosphere destroys it.
- Sulfur causes hot-short, phosphorus causes cold-short — so you can diagnose a bad ore instead of blaming the gods.
Sources and limits
- OSHA summarizes carbon-monoxide hazards and controls; a hood without verified capture and monitoring is not proof of safe air.
- NIOSH explains control of respirable crystalline silica during ore, refractory, flux, and slag handling.
- Furnace design, ore/slag chemistry, hot-metal handling, heat treatment, and structural product release require qualified process design, sampling, and testing. The temperatures and historical examples here are orientation, not a universal smelting or heat-treatment specification.