Leather and Tanning
Difficulty: easy to do badly, moderate to do well, and it always smells. Prerequisites: lime, tannin-rich bark, sharp blades, water, and 6–18 months of patience for the best results.
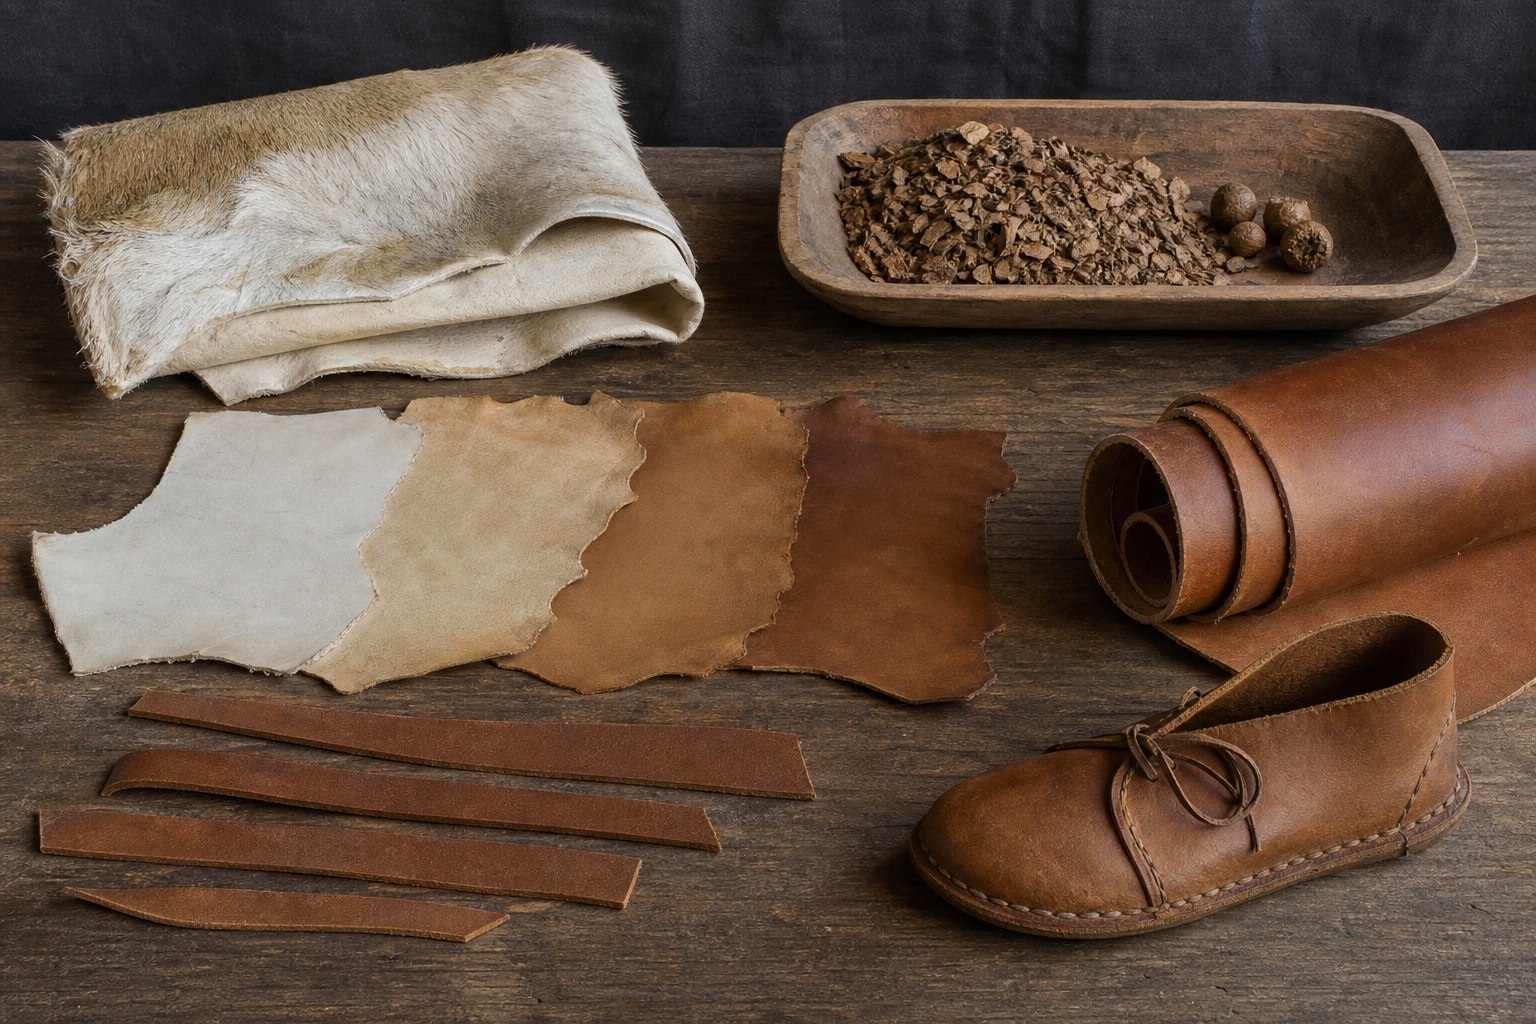
AI-generated visual reference: cured and prepared hide with tannin material → tanned samples → finished leather, straps, and footwear. It is not a historical photograph, hygiene standard, or tanning endpoint.
Why it matters
Before rubber, plastic, and canvas, leather was the flexible engineering material. It's what you make bellows from, and every furnace in this repo depends on bellows. Also: shoes, harness (including the horse collar, which lets a horse put its weight into a heavy pull), belts and drive bands for machinery, buckets, hinges, armor, book bindings, parchment, water bottles, and hydraulic seals.
It's also waste turned into wealth. Hides are a by-product of eating; if you don't tan them they rot. Any settlement that slaughters animals has the raw material already.
What tanning actually is
A raw hide is mostly collagen. Wet, it rots within days as bacteria digest it. Dried, it becomes rawhide — hard as wood, and it turns back into a rotting hide the moment it gets wet again.
Tanning or dressing makes collagen more resistant to putrefaction and changes its wet/dry behavior; no leather becomes immune to water, microbes, heat, or poor storage. The historical systems below are distinct:
- Vegetable tanning — plant tannins form cross-links between collagen fibers. Firm, thick, water-resistant, ages beautifully. Slow.
- Brain dressing — an emulsified fat dressing plus continuous softening, normally followed by smoke stabilization. Soft and breathable, but not the same chemistry as vegetable tanning or alum tawing.
- Oxidative oil/chamois tannage — selected unsaturated oils are worked into prepared hide and oxidized under a controlled process. It is not merely any hide rubbed with fat.
- Alum tawing — aluminum salts. White, soft, but not permanent — it washes out in water. Historically important for fine white leather and gloves.
- Smoke finishing/stabilization — smoke products help a brain-dressed hide resist wetting and dry softer again; it is normally a finishing step, not a complete substitute for the preparation and softening.
Step 1: Flay and cure
Skin the animal carefully — a knife cut through the hide is a permanent hole, and holes are where finished leather tears. Work from the inside out where possible, using your fist and the knife's back more than the edge.
Cure immediately. A fresh hide begins to rot in hours in warm weather.
- Salt curing: a common starting range is 20–30% of hide weight, but preservation depends on complete coverage, drainage, temperature, hide thickness, and cool dry storage. Inspect regularly; a warm, wet, poorly salted stack is not made safe by the nominal dose.
- Drying: stretch on a frame and dry hard in shade. Lighter to transport, but it must be rehydrated carefully later and can be damaged by fast drying.
Step 2: Soak and clean (beamhouse work)
This is the dirty half of the job and it decides quality.
Soak the cured hide in contained, frequently changed process water until it is evenly rehydrated. Do not use a stream as both bath and drain: soak water carries salt, organic load, and pathogens and must enter the tannery's characterized treatment system.
Flesh it. Lay it over a rounded log (a beam) and scrape all fat, membrane, and meat off the flesh side with a dull two-handled blade. Anything left behind blocks the tanning liquor from penetrating and will rot in place. This is hard physical work and there is no shortcut.
Remove the hair. Three options:
- Liming — use a characterized slaked-lime bath and monitor pH, temperature, time, and hair slip. The alkali loosens hair and swells the fiber structure. This is a standard method and another use for the lime kiln from cement and concrete.
- Sweating — hang the hide in a warm humid place until bacteria loosen the hair. This is controlled putrefaction: segregate it, monitor temperature and slip frequently, and reject a hide that has begun to rot.
- Wood ash liquor — historically used but chemically variable and potentially caustic. Measure it rather than assuming it is simply weak lime.
Scud — scrape the loosened hair off over the beam, then scrape the flesh side again to remove the loosened root sheaths.
Delime and bate. Reduce alkalinity gradually with a documented bath, agitation, and measured bath/hide pH. A direct acid shock—especially guessed vinegar—can acid-swell or damage the outer hide while the core remains alkaline. Controlled bran or commercial/identified enzyme bates can remove residual non-collagen proteins.
Dung bating is historically authentic but pathogen-rich and chemically variable. Prefer a controlled enzyme or bran process. If documenting historic practice, do not treat downstream disposal as a control: segregate workers, prevent aerosols and skin contact, and contain and treat every bath and rinse.
Handle lime with care — see the warnings in basic chemicals. It burns skin and eyes, and tanners' hands were notoriously damaged.
Step 3a: Vegetable tanning (the durable leather)
Sources of tannin
| Source | Tannin content | Notes |
|---|---|---|
| Oak bark | 10–15% | The European classic. Strip in spring when the sap runs |
| Hemlock, spruce, larch bark | 10–13% | Gives redder leather |
| Chestnut wood | 10–13% | Excellent, and uses the wood not just the bark |
| Mimosa/wattle bark | 30–40% | Very high; fast |
| Quebracho heartwood | 20–30% | South American, extremely strong |
| Oak galls | 50–70% | Highest of all — also your ink source |
| Sumac leaves | 25–35% | Fine pale leather, traditional for bookbinding |
| Myrobalan, tara pods, tea, willow, birch | varies | All usable |
Test any candidate: boil a sample and add a drop of iron solution. A strong black-purple means good tannin content — the same reaction as iron gall ink.
Harvest bark from trees already felled under a managed coppice or forestry plan. Do not strip a ring around a living tree: girdling can kill it and an unmanaged tannery can exhaust its woodland faster than the pits consume hides.
The pit process
Grind or shred the bark and steep it in water to make tanning liquor. Multiple extractions of the same bark give progressively weaker liquor — don't waste them, they're exactly what you need first.
Start weak. This is the rule that everything depends on. Put the hide in the weakest (most exhausted) liquor first and move it through progressively stronger pits over weeks and months.
Why: strong tannin liquor tans the outer surface almost instantly, forming a sealed case that stops anything reaching the middle. The result is "case hardened" leather — tanned skin over raw, rotting core. Starting weak lets the tannin diffuse all the way through before it fixes. Every beginner ruins their first hide this way.
Layering (the traditional method): stack hides flat in a pit with ground bark between each layer, fill with liquor, and leave. Repack into fresh bark every few weeks.
Time: thin skins take 6–8 weeks. Thick shoulder or butt leather for shoe soles traditionally took 12–18 months. Modern chrome tanning does it in a day, which is why vegetable-tanned leather is now a premium product.
Test for completion: cut a small piece from the edge. The cross-section should be uniformly colored right through, with no pale raw streak in the middle.
Currying and finishing
Tanned leather straight from the pit is stiff and harsh. Currying turns it into a usable material:
- Rinse and scour off surface tannin ("bloom").
- Work in fats and oils while the leather is still damp — tallow, neatsfoot oil (rendered from cattle feet), fish oil, or a mixture ("dubbin"). The fat lubricates the fibers so they slide instead of cracking.
- Set and stretch the leather out flat on a table with a slicker to compress and smooth it.
- Dry slowly, working it as it dries.
- Optionally: boarding (folding and rolling to soften and raise a grain pattern), dyeing (see dyes and ink), and burnishing the edges.
Step 3b: Brain tanning (the soft leather)
Fast, needs no bark, and produces beautifully soft, breathable buckskin. The traditional saying is that every animal has enough brain to tan its own hide, and it's roughly true — brains are rich in emulsified lecithin and fats.
Brain and nervous tissue from cervids and other ruminants can carry prion disease without an obvious sensory warning. Do not use tissue from found-dead, sick, suspect, or uninspected animals. Where prion status cannot be controlled, use egg yolk or a characterized soap-and-oil emulsion instead; ordinary cooking, smoking, or disinfection does not make prion tissue reliably safe.
- Flesh and dehair as above (or leave the hair on for a fur).
- Make a slurry of the brains (or substitute egg yolk, or soap and oil) in warm water.
- Soak or work the slurry thoroughly into the hide until saturated. Wring it out, re-soak, repeat two or three times.
- Soften while drying — this is the whole job. As the hide dries you must work it continuously: stretch it, pull it over a stake or rope, twist it, rub it. If you stop before it's fully dry, it dries stiff as rawhide and you have to start over. Expect several hours of continuous physical work.
- Smoke-finish it under controlled conditions. Smoke products help stabilize the dressing so the hide can dry soft again after wetting. Use a designed smoke path and fire enclosure, keep people out of the plume, monitor carbon monoxide, prevent flame contact, and never smoke in an occupied room.
This guide stops at finished leather. Cutting and sewing it into garments, and above all into footwear that fits and can be repaired, is in clothing, sewing, and footwear — which also covers dressing a hide with the fur left on, for cold-weather use.
Rawhide — don't overlook it
Simply dehair a hide and dry it flat under tension. No tanning at all. Rawhide is extremely strong and hard, and shrinks tightly as it dries — which makes it a free fastener:
- Wrap wet rawhide around a joint and it clamps hard as it dries. This is how tool handles, axe hafts, and composite bows are bound.
- Drum heads, shield facings, lacing, snowshoe webbing, whips, and the running surfaces of primitive machinery.
- Glue: controlled extraction of clean collagen-rich hide scraps, connective tissue, tendons, cartilage around feet, or fish skin/bone gives hide or gelatin glue — the standard woodworking adhesive for millennia (see woodworking), and gelatin size for paper.
Nothing is wasted. Hair becomes felt, plaster reinforcement, and brushes. Collagen-rich trimmings become glue. Fat becomes soap and currying oil. Hoof and horn themselves are mainly keratin—use them for items such as combs, buttons, and translucent horn panels, not as the primary glue feedstock.
Parchment and vellum
Not tanned at all — a different product from the same raw material, and the writing surface of the entire medieval world before paper.
- Lime and dehair the skin as above.
- Stretch it on a frame under high tension.
- While stretched and drying, scrape it repeatedly with a curved knife (lunellum), thinning it and working it as it dries.
- Pounce with chalk and pumice to raise a smooth, slightly toothed writing surface.
The tension during drying is what does it: the collagen fibers are stretched into parallel sheets rather than a random felt. That's why parchment is translucent, dimensionally stable, and lasts a thousand years — and why it goes wavy if it gets damp and relaxes.
One calfskin makes a handful of leaves. A large Bible consumed a herd. This is exactly why paper mattered so much.
Failure modes
| Symptom | Cause | Fix |
|---|---|---|
| Hide rots during processing | Too warm, too slow, cure skipped | Salt promptly; work cool; keep the process moving |
| Hair won't come off | Under-limed or under-sweated | More time in lime; check daily |
| Hide dissolves, feels slimy | Over-limed or over-sweated | Shorter treatment; watch it closely |
| Finished leather is hard and brittle at the core | Case hardened — started in strong liquor | Always start with weak/exhausted liquor and build up |
| Leather cracks when bent | No currying, no oils | Work in fat while damp; more oiling |
| Brain-tan dries stiff as a board | Stopped working it before dry | Re-wet and re-soften; work continuously until bone dry |
| Dressed hide goes stiff after wetting | Dressing/stabilization, fiber lubrication, drying, or service exposure is unsuitable | Reassess the exact process and intended service; do not add uncontrolled smoke or suspect brain tissue as a generic repair |
| Alum-tawed leather loses properties when wet | Tawing system and finish are not suited to that exposure | Keep it in a compatible dry service or select and validate a different tannage/finish; “brain tanning” is not a universal wet-service specification |
| Leather has holes and tears | Knife damage during flaying | Flay more carefully; use damaged hides for small parts |
| Leather is blotchy and uneven | Uneven fleshing or liming | Flesh thoroughly; stir the lime pit daily |
| Finished leather stinks permanently | Fat left on, or incomplete process | Flesh completely; complete the tannage |
Safety and siting
- Lime burns. Cover up, protect your eyes.
- Anthrax is a genuine occupational hazard of hides and hair. Use inspected, traceable animals and a local animal-health program; exclude found-dead, sick, or suspect animals, isolate suspect material, suppress dust, provide hygiene and appropriate protective equipment, and seek public-health/veterinary direction after a suspected exposure. Spores can persist for decades.
- Bating solutions and rotting flesh carry serious pathogens. Wash thoroughly, and never process hides near a water source or food preparation. See medicine.
- Contain and treat tannery waste. Downstream/downwind siting merely transfers pathogens, oxygen demand, sulfides, salts, lime, and organic pollution to other people and ecosystems. Separate clean and dirty water, use lined containment and a characterized treatment system, monitor discharge and groundwater, and keep the operation out of drinking-water catchments and flood zones. Do not operate if safe waste management is unavailable.
Era notes
Tanning is older than agriculture; leather clothing predates woven cloth. Vegetable tanning with bark is attested from ancient Egypt onward, and the process changed very little until chrome tanning arrived in 1858.
Your knowledge advantages: understanding why to start in weak liquor (diffusion before fixation, avoiding case hardening), deliming properly before tanning, distinguishing dressing, tawing, oil tannage, and smoke finishing, and containing pathogens and tannery effluent instead of transferring them downstream.
Sources and limits
- CDC describes occupational and animal-source precautions for anthrax.
- CDC's chronic wasting disease guidance explains why potentially infected cervid nervous tissue should not be consumed or casually handled; brain-dressing substitutions avoid that route.
- EPA's leather tanning and finishing effluent guidelines show the range of pollutants that containment and treatment must address.
- This is historical process orientation. Animal-health clearance, chemical exposure control, wastewater treatment, and product fitness require site-specific qualified review.